How to Reduce Backpack Weight by 10 Lbs: A Step-by-Step Guide

Transitioning to a lighter pack requires a systematic approach to gear evaluation rather than simply buying new equipment. This guide outlines the essential steps for beginners to safely and effectively shed 10 pounds from their base weight.
- Start by weighing every item you own with a digital kitchen scale to establish a baseline.
- Target the 'Big Three' (shelter, sleep system, and backpack) for the most significant weight reductions.
- Eliminate redundant clothing and 'what if' items driven by packing fears rather than environmental realities.
- Adopt multi-use gear strategies to maximize utility while minimizing total pack weight.
The Philosophy of Ultralight: Defining Base Weight
Base weight is the foundational metric of ultralight backpacking, defined strictly as the total weight of a loaded backpack minus all consumables. Consumables include water, food, stove fuel, and occasionally items like toothpaste or sunscreen that deplete over the course of a trip. By isolating the static load from the variable load, hikers can objectively compare gear systems and track reduction progress regardless of whether they are packing for an overnight trip or a ten-day unsupported traverse.
Transitioning to an ultralight system requires a fundamental shift in how gear is evaluated. It is not merely a process of purchasing lighter alternatives, but rather adopting a minimalist framework where every item must justify its inclusion through high utility or multi-functionality. This philosophy demands that hikers critically assess the function-to-weight ratio of their entire kit, recognizing that carrying excess weight directly translates to increased fatigue, higher caloric expenditure, and greater stress on joints.
A critical distinction must be made between functional ultralight packing and dangerous minimalism, often referred to as 'stupid light.' Pushing a base weight too low without possessing the requisite wilderness skills, or carrying insufficient gear for a specific environment, severely compromises safety. While a sub-ten-pound base weight is the traditional benchmark for the ultralight category, the actual target must always align with the expected weather conditions, the season, and the specific demands of the route.
- Consumables exclusion: Water, food, and fuel fluctuate daily and are omitted to create a stable, comparable metric.
- Worn weight separation: Clothing worn, trekking poles in hand, and footwear are tracked independently as they do not load the spine.
- The ten-pound threshold: The established, albeit somewhat arbitrary, boundary separating lightweight from ultralight systems.
- Static versus dynamic loads: Base weight represents the constant, static burden your pack suspension must manage.
- Skill replacement: As gear margins shrink, site selection, weather reading, and navigation skills must improve to compensate.
Step 1: The Digital Scale and Gear Inventory
The process of pack reduction relies entirely on accurate data. Manufacturer specifications are notoriously unreliable, often reflecting pre-production prototypes or omitting the weight of included accessories like stuff sacks, guylines, and stakes. Establishing a true baseline requires weighing every individual item on a highly accurate digital kitchen scale. Measuring in grams rather than ounces provides the necessary granularity to track minor modifications and cumulative savings.
Logging these weights into a digital spreadsheet forces accountability and highlights where the bulk of the weight resides. Categorizing items into distinct systems—such as shelter, sleep, kitchen, and clothing—provides a visual breakdown of the load. This analytical approach prevents hikers from spending excessive time and money cutting fractions of an ounce from a toothbrush while ignoring a disproportionately heavy fleece or redundant camp shoes.
A thorough gear audit frequently reveals hidden weights that accumulate silently. Heavy commercial packaging, redundant organizers, and excessive stuff sacks can easily add up to a full pound of unnecessary material. By weighing items individually rather than as bundled systems, hikers can identify exact upgrade opportunities. For example, weighing a tent body, fly, poles, and stakes separately clarifies whether the entire shelter needs replacing or if simply upgrading to carbon fiber stakes and lighter guylines will suffice.
- Gram precision: Utilizing grams provides the exact measurement required to evaluate small modifications and trims.
- Manufacturer discrepancies: Expect a standard variance between listed specifications and real-world weight, often skewing heavier.
- Component isolation: Breaking down bundled items into their constituent parts isolates specific, low-cost upgrade opportunities.
- Categorical analysis: Grouping gear by function highlights inefficiencies and directs focus toward the heaviest systems.
- Digital tracking: Spreadsheets allow for dynamic trip planning, enabling hikers to mix and match gear digitally before packing.
Step 2: Addressing the Big Three
The 'Big Three'—the shelter, sleep system, and backpack—represent the highest concentration of weight in any traditional backpacking kit. Tackling these core components first yields the highest absolute return on investment. Attempting to achieve an ultralight base weight by optimizing accessories while ignoring a heavy tent or synthetic sleeping bag is mathematically impossible. These three systems dictate the baseline bulk and weight of the entire load.
Significant weight savings in shelters and sleep systems dictate a shift in materials and design. Transitioning from double-wall, freestanding tents to single-wall shelters supported by trekking poles eliminates the need for dedicated aluminum tent poles. In sleep systems, high-fill-power down quilts provide superior warmth-to-weight ratios compared to traditional mummy bags by removing the hood, the full-length zipper, and the compressed, thermally inefficient insulation beneath the sleeper.
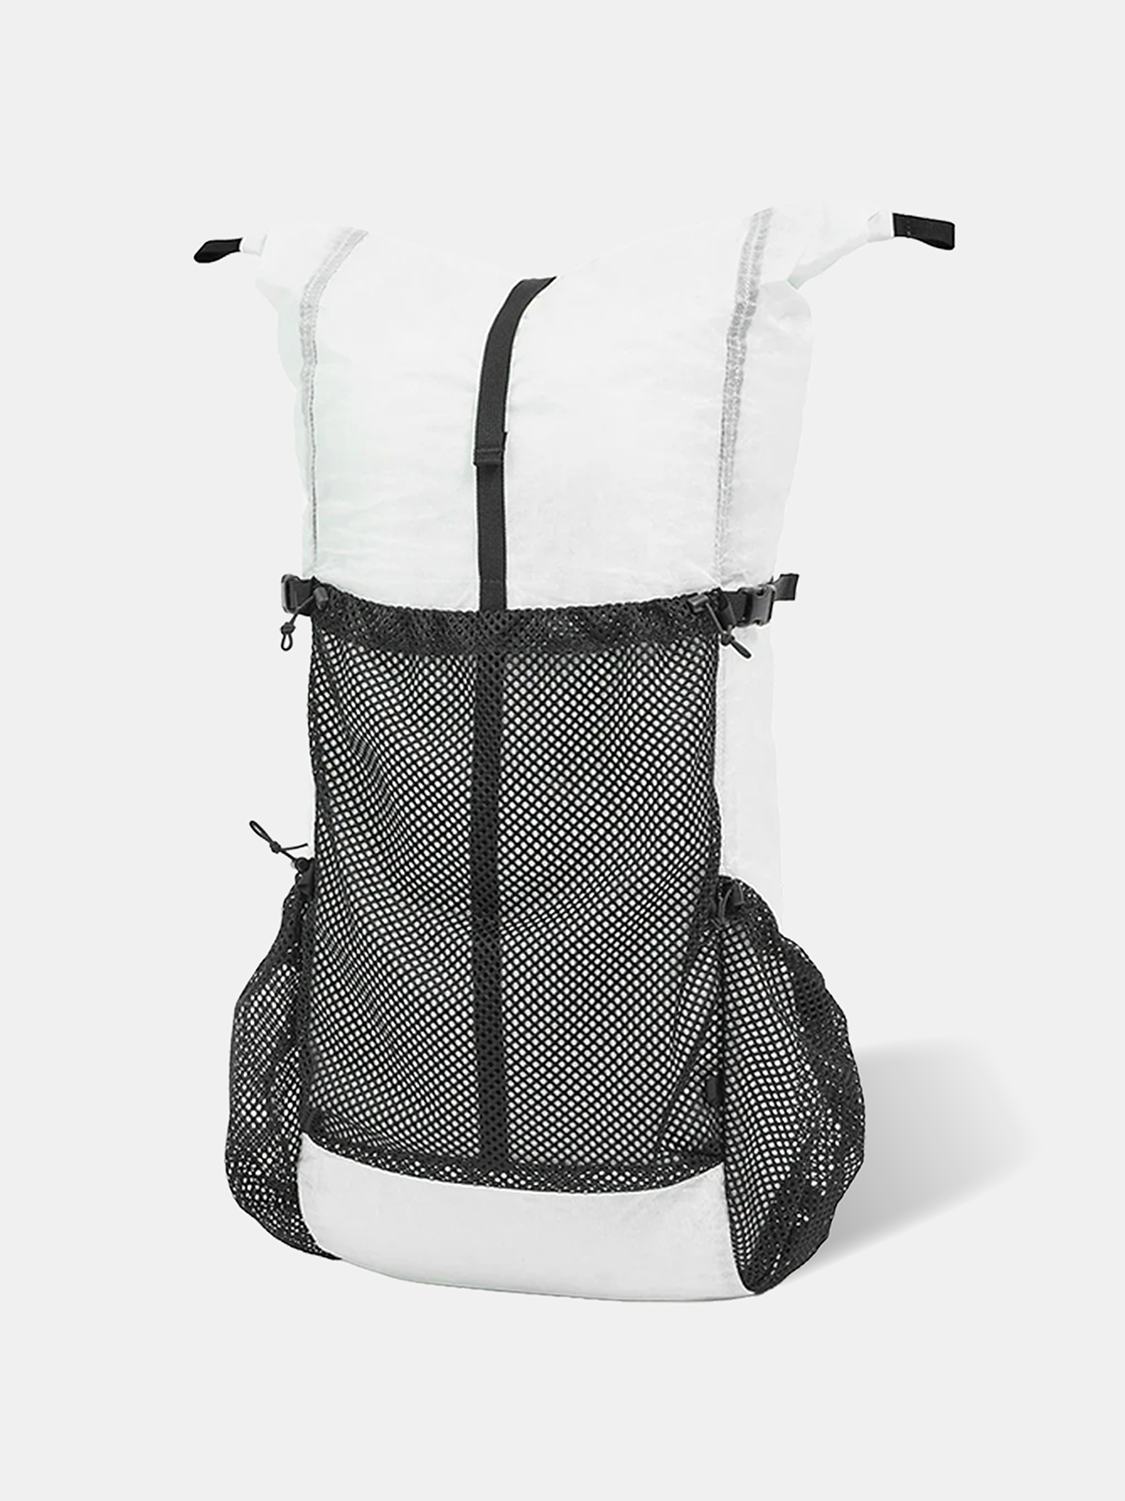
Crucially, the backpack must be the final upgrade in the Big Three sequence. Purchasing a low-volume, frameless ultralight pack before reducing the bulk and weight of the shelter and sleep system results in an overstuffed, poorly carrying load. Advanced pack materials like UltraPE or Dyneema Composite Fabric offer exceptional tear strength and weather resistance at minimal weight, but frameless designs lack the rigid suspension required to transfer heavy loads to the hips, making a dialed-in base weight mandatory before transitioning.
- Order of operations: Always finalize the volume and weight of the shelter and sleep system before purchasing a new backpack.
- Trekking pole integration: Utilizing existing walking poles for shelter support removes significant static weight from the pack.
- Quilt efficiency: Quilts maximize thermal efficiency by eliminating redundant materials and relying on an insulated sleeping pad for bottom warmth.
- Material transitions: Moving from standard polyurethane-coated nylons to silpoly or DCF reduces shelter weight and minimizes water absorption.
- Suspension limits: Frameless packs strictly limit the maximum comfortable carry load, requiring a disciplined approach to total pack weight.

Step 3: Eliminating Redundancies and 'What If' Gear
Backpackers often pack their fears, which manifests as redundant gear and items carried solely for highly improbable scenarios. Experienced hikers transitioning to ultralight must shift from a mindset of absolute self-reliance in all possible disasters to one of statistical probability and skill-based problem solving. A piece of gear that serves only one niche purpose, particularly one that relies on a rare sequence of failures to become necessary, is dead weight.
Redundancy frequently hides in plain sight through single-use items. A dedicated camp pillow, a heavy multi-tool with pliers and a saw, and a battery-powered lantern all represent weight that can be absorbed by items already in the pack. A spare set of clothing is the most common redundancy; a proper layering system negates the need for a secondary dry shirt, as body heat and synthetic insulation manage moisture effectively. The goal is to ensure every item, with the exception of dedicated emergency medical and repair gear, serves at least two functions.
'What if' gear is often driven by a lack of environmental knowledge. Carrying a massive fixed-blade knife for shelter building ignores the reality that modern ultralight shelters require only stakes and trekking poles. Similarly, carrying an oversized bear canister where a standard bear hang is legal and effective adds unnecessary ounces. By studying the specific route, climate, and local regulations, hikers can eliminate heavy contingencies and rely on environmental awareness and trip planning rather than physical gear.
- Dedicated camp shoes: A properly fitted, breathable trail runner dries quickly and negates the need for a secondary shoe.
- Large multi-tools: A simple razor blade or minimalist micro-tool handles the vast majority of gear repairs and first-aid tasks.
- Redundant fire starters: One primary lighter and a backup mini-lighter or matchbook are sufficient; magnesium blocks and hatchets are unnecessary.
- Stuff sacks: Waterproof pack liners eliminate the need for individual heavy dry bags for every clothing and gear category.
- Spare clothing: Aside from dedicated sleep socks, extra hiking shirts or pants offer no functional advantage over a well-managed primary layer.
Step 4: Repackaging and Trimming
Once the major gear choices are finalized, weight reduction becomes a game of attrition. Repackaging and trimming involve removing the excess material built into products for retail display, broad consumer fit, or generic usage. Commercial packaging is inherently heavy, designed for durability on store shelves rather than efficiency on the trail. Transferring consumables into minimalist containers is a zero-cost method of dropping significant weight across the entire pack.
Toiletries, first aid supplies, and repair kits are prime candidates for repackaging. A standard tube of toothpaste or a hard plastic bottle of ibuprofen contains more packaging weight than product weight. Transferring these into micro-dropper bottles, small zip-seal bags, or single-use formats eliminates the rigid plastic penalty. This principle extends to the camp kitchen; commercial dehydrated meals feature heavy, gusseted mylar bags. Repackaging these meals into standard freezer bags for freezer-bag cooking or cold soaking reduces trash volume and pack weight simultaneously.
Trimming requires a permanent commitment to modifying gear. Most backpacks are manufactured with excessively long webbing straps to accommodate the widest possible range of body types. Once a hiker's fit is dialed in, the excess nylon webbing can be cut and the ends seared to prevent fraying. Beyond straps, hikers can remove hydration bladder sleeves, excess internal pockets, and heavy zipper pulls. Caution is required, however, as trimming structural components or load-lifter straps can compromise the pack's integrity and carry comfort.
- Toothpaste dots: Dehydrating toothpaste into small dots or using commercial tooth powder eliminates the heavy plastic tube.
- Dropper bottles: Transferring liquid soap, water treatment drops, and hand sanitizer into small dropper bottles matches the volume to the trip length.
- Strap reduction: Trimming hip belt, shoulder, and compression straps to leave only a few inches of workable excess.
- Label removal: Cutting off heavy, multi-page care tags from clothing, sleeping bags, and tents.
- Zipper pulls: Replacing heavy metal zipper tabs with lightweight reflective cordage.
Step 5: Clothing Systems and Layering Efficiency
An ultralight clothing system is built on the strict division between active layers worn while moving and static layers worn while stopped. Traditional backpackers often carry multiple shirts or pants for different days, resulting in dead weight. The ultralight approach utilizes a single active outfit designed to manage moisture and dry quickly, paired with static layers that provide maximum warmth-to-weight ratios when the body is no longer generating heat.
The active layer must prioritize moisture management over insulation. Lightweight synthetic fabrics like polyester excel at moving sweat away from the skin and drying rapidly, though they retain odor over time. Merino wool blends offer odor resistance and comfort but dry slower and are less durable. Regardless of the material, the active layer is meant to be worn daily, washed in town, and allowed to dry on the body. A lightweight wind shell is often paired with the active layer, providing significant convective warmth while moving without the bulk or sweat-trap effect of a waterproof jacket.
Static insulation relies on high-loft materials. Down remains the standard for warmth-to-weight, with high fill-power down garments offering compressibility. Synthetic insulation, while heavier and less compressible, retains warmth when wet, making it preferable in sustained freezing rain or high-humidity environments. Rain gear should be viewed as part of the thermal system rather than just precipitation protection. A minimalist silnylon, silpoly, or advanced breathable laminate rain jacket traps body heat effectively, serving as the outermost barrier in the layering system.
Dedicated camp clothes are a luxury that adds unnecessary weight. Instead, the static layers double as sleepwear to boost the temperature rating of the sleep system. The only dedicated sleep clothing should be a pair of lightweight, clean socks to protect the sleeping bag from dirt and oils, and perhaps a lightweight thermal baselayer if pushing the limits of the quilt. By ensuring every piece of clothing can be worn simultaneously without restrictive binding, the hiker maximizes thermal efficiency with minimal garments.
- Active top and bottom: A single lightweight synthetic or merino blend shirt, paired with running shorts or breathable hiking pants.
- Wind shell: A highly breathable, uninsulated nylon layer weighing only a few ounces to block wind chill during exertion.
- Static mid-layer: A high-fill down or synthetic jacket used exclusively at camp or during extended rest stops.
- Rain shell: A minimalist waterproof jacket that doubles as a vapor barrier and thermal layer in harsh conditions.
- Sleep socks: One pair of dedicated, clean socks kept strictly in the sleep system to maintain foot warmth and hygiene.
Step 6: Streamlining the Camp Kitchen
The traditional camp kitchen is often a source of massive weight bloat, characterized by multi-piece nesting pots, heavy liquid fuel stoves, and dedicated frying pans. Ultralight philosophy treats the kitchen as a water-boiling system rather than a culinary station. By shifting the menu toward freeze-dried meals or dehydrated staples, hikers can eliminate all cookware except a single titanium pot or mug, typically in the 550ml to 750ml range. Titanium is the standard here because of its high strength-to-weight ratio and low thermal conductivity at the lip, though it is prone to hot spots if used for actual cooking rather than just boiling.
Stove selection dictates the rest of the kitchen system. Canister stoves are the modern standard for efficiency and convenience, threading directly onto isobutane-propane mix canisters. However, the weight of the empty steel canister must be factored into the overall system weight. Alcohol stoves, often made from recycled aluminum cans or spun titanium, offer a lighter base weight and the ability to carry exactly the amount of fuel needed for a trip in a lightweight plastic bottle. The tradeoff is slower boil times, susceptibility to wind, and fire ban restrictions in dry regions. Solid fuel tablets present another ultralight alternative, requiring only a minimalist folding stand, though they leave a sticky residue on pots and have a distinct odor.
The ultimate reduction in kitchen weight is abandoning the stove entirely, a practice known as cold soaking. This involves rehydrating foods like couscous, instant beans, or oats in a watertight plastic jar over several hours while hiking. Cold soaking drops the weight of the stove, fuel, and metal pot, replacing them with a single plastic container. While highly efficient for long-distance hikers covering massive daily mileage, the psychological toll of eating cold meals in freezing rain makes this a polarizing strategy that requires careful consideration of the expected climate and personal morale.
- Transition to a single titanium pot used solely for boiling water, leaving frying pans and nesting sets behind.
- Replace heavy lexan or metal cutlery with a single long-handled polished titanium spoon to reach the bottom of dehydrated meal bags.
- Evaluate fuel efficiency by trip length; alcohol stoves excel on short weekend trips, while canister stoves become more weight-efficient on longer stretches.
- Utilize a simple foil windscreen for alcohol or solid fuel stoves to drastically improve efficiency without adding significant weight.
- Consider cold soaking using a repurposed plastic jar to eliminate all metal cookware and fuel weight during high-mileage summer trips.

Step 7: Water and Filtration Strategies
Water is consistently the heaviest consumable in a pack, making efficient carrying and filtration strategies critical. The most immediate weight saving comes from replacing heavy, hard-sided polycarbonate bottles with disposable PET plastic water bottles found in grocery stores. These bottles are a fraction of the weight, surprisingly durable, and feature threads that mate perfectly with popular hollow-core membrane filters. Soft flasks and collapsible bladders offer another lightweight alternative, collapsing as they empty to save volume, though they are more prone to punctures and seam failures over high-mileage use.
Filtration technology in the ultralight space is dominated by hollow-fiber membrane squeeze filters. These units are compact, thread directly onto dirty water bladders or PET bottles, and allow hikers to drink on the go. Pump filters and gravity systems with multiple hoses and dedicated clean-water reservoirs add unnecessary bulk and mechanical complexity. The primary vulnerability of hollow-fiber filters is freezing; if the residual water inside the membrane freezes, the micro-tubes expand and shatter, rendering the filter useless without any visual indication of failure. Hikers operating in shoulder seasons must keep their filters close to their bodies during the day and inside their sleeping bags at night.
Carrying capacity should be dynamic, dictated by the specific water sources on the route rather than a fixed daily habit. Carrying three liters of water through a humid forest with streams every mile is a common error that adds unnecessary pounds. Ultralight hikers study topographical maps and water reports to carry only enough water to reach the next reliable source, plus a small safety margin. This strategy often involves drinking a liter or more directly at the source to minimize the amount carried on the back. Chemical treatments, such as chlorine dioxide drops or tablets, serve as an ultralight backup to mechanical filters or as a primary purification method for hikers willing to wait for the required contact time.
- Swap heavy polycarbonate bottles for lightweight, durable PET plastic water bottles.
- Adopt hollow-fiber squeeze filters that thread directly onto standard plastic bottles to eliminate hoses and pump mechanisms.
- Protect hollow-fiber filters from freezing temperatures by storing them in clothing pockets or sleeping bags.
- Calculate water carries based on reliable source spacing rather than defaulting to a full capacity every morning.
- Carry a minimal amount of chemical purification tablets as a failsafe against mechanical filter failure or freezing.
Step 8: First Aid, Hygiene, and Electronics
The repository for first aid, hygiene, and electronics is where ounces quietly accumulate into pounds. Commercial first aid kits are notoriously heavy, packed with redundant items, heavy canvas zippered cases, and supplies for scenarios beyond wilderness triage. An ultralight first aid kit is custom-built in a small silnylon sack or plastic zip-top bag, focusing on high-probability issues like blisters, minor cuts, and gastrointestinal distress, alongside trauma essentials like a single roll of rigid strapping tape, sterile gauze, and anti-inflammatories. The goal is stabilization and evacuation, not establishing a backcountry hospital.
Hygiene kits require a similarly ruthless audit. Full-sized toothbrushes can be cut in half or replaced with travel-sized alternatives. Toothpaste, sunscreen, and hand sanitizer should be decanted into micro-dropper bottles sized precisely for the duration of the trip, rather than carrying standard travel sizes which often hold weeks of excess product. Camp towels, heavy deodorants, and large packs of wet wipes are entirely omitted by strict ultralight practitioners. Trowels for waste disposal have evolved from heavy plastic or steel to stamped aluminum or titanium, maintaining the necessary leverage to dig in rocky soil while registering almost nothing on the scale.
Electronics management hinges on balancing safety, navigation, and power consumption. The core of this system is the power bank, which must be sized according to the hiker's device usage and days between town charging opportunities. Overestimating power needs leads to carrying dense, heavy lithium-ion bricks. Hikers can minimize required capacity by keeping smartphones in airplane mode, reducing screen brightness, and using dedicated GPS devices only when necessary. Consolidating cables by choosing devices that all share a single standard eliminates the need for multiple cords. Headlamps should be evaluated for their battery type; rechargeable internal batteries are increasingly lighter than models relying on replaceable alkaline batteries, though they require disciplined power management.
- Build a custom first aid kit focused on blisters, minor wounds, and essential medications, stored in a lightweight plastic bag.
- Repackage liquids like hand sanitizer, soap, and sunscreen into micro-dropper bottles sized for the specific trip length.
- Replace heavy plastic or steel trowels with ultralight stamped aluminum or titanium models.
- Size power banks based on realistic daily consumption and time between resupplies to avoid carrying excess lithium-ion weight.
- Standardize all electronic devices to a single charging port type to reduce cable redundancy.
Common Mistakes When Transitioning to Ultralight
The most pervasive error in pack reduction is falling into the 'stupid light' trap, where hikers sacrifice safety, durability, or necessary functionality to achieve an arbitrary base weight. This often manifests in selecting highly specialized gear designed for specific, narrow conditions and deploying it in general three-season environments. A tarp meant for fast-and-light alpine pushes may lack the coverage needed for a multi-day sustained rainstorm, just as a minimalist first aid kit stripped of trauma supplies becomes a liability rather than an optimization. Ultralight backpacking relies on skill and environmental awareness replacing heavy gear; removing the gear without first acquiring the corresponding skills inevitably leads to compromised safety or miserable trail experiences.
A structural mistake occurs when hikers purchase an ultralight, frameless backpack before reducing the weight and volume of their other equipment. Frameless packs lack rigid aluminum stays or carbon hoops, relying instead on the structural integrity of the packed gear—often a folded closed-cell foam pad—to transfer weight to the hips. These packs have strict physical load limits before the suspension collapses, causing the pack to barrel out and transfer the entire load directly onto the shoulders. Transitioning the backpack before the shelter, sleep system, and clothing are adequately miniaturized forces the hiker to carry a heavy, high-volume load in a vessel completely unequipped to handle it.
Finally, transitioning hikers frequently misunderstand the durability tradeoffs inherent in ultralight materials. Moving from traditional 210D woven nylons to 0.51 oz/yd² Dyneema Composite Fabric or 7D silnylon requires a fundamental shift in how gear is handled and where it is pitched. Ultralight fabrics possess high tensile strength but are often susceptible to puncture and abrasion. Treating a sub-two-pound tent with the same disregard as a traditional six-pound freestanding dome will result in tears from sharp rocks, thorns, or improper tensioning. The transition to ultralight requires adapting behavior and site selection protocols just as much as it requires changing equipment.
- Purchasing a frameless, low-volume backpack before the shelter and sleep system have been reduced in weight and bulk.
- Leaving behind essential navigation or emergency communication devices to shave a few ounces off the base weight.
- Failing to adapt campsite selection for single-wall shelters, leading to severe condensation issues in high-humidity microclimates.
- Transitioning abruptly to minimalist, zero-drop trail runners without allowing the Achilles tendon and calf muscles time to physically adapt.
- Relying on the absolute limit temperature ratings of ultralight quilts without accounting for the lack of heavy camp clothing to supplement the insulation.
FAQ
Do I need to spend a lot of money to reduce my pack weight?
What is the difference between base weight and total weight?
Should I buy a new ultralight backpack first?
The bottom line
Reducing your pack weight is an iterative process of strict evaluation, elimination, and careful upgrading. By systematically applying these steps and tracking your progress, hikers can significantly decrease their base weight, resulting in less joint fatigue and a more sustainable pace on the trail.
Related guides
Keep building your system with these closely related guides.
- MSR WhisperLite vs WhisperLite International vs Universal: Liquid-Fuel Stoves Compared
- How to Transition to Ultralight Backpacking
- How to Reduce Your Backpacking Base Weight Step by Step
- How to Pack a Backpack: A Practical System That Works
- Ultralight Backpacks: 9 Packs Compared per Liter and Load
- 5 Best Ultralight Dog Gear Items to Cut Pack Weight
- Ultralight Weight Measurement Standards: The Complete Guide
- Ultralight Gear Evaluation: Our Analytical Methodology
Further reading
Authoritative sources to go deeper on the topics above.