How to Choose Dry Bags and Stuff Sacks for Ultralight Backpacking

Selecting the right dry bags and stuff sacks dictates how well your gear is protected from moisture and how efficiently your backpack carries. This guide breaks down material properties, closure mechanisms, and volume calculations to help you build a modular packing system that prevents water ingress without adding unnecessary weight or creating dead space in your pack.
- Match the closure type to the moisture risk: roll-top bags for critical insulation, drawcord sacks for organization.
- Avoid over-compartmentalizing, which creates rigid cylinders that leave empty voids inside your backpack.
- Select materials based on abrasion exposure, prioritizing durable composites for external use and lighter siliconized fabrics for internal organization.
- Factor in the three-roll minimum when calculating the usable volume of any roll-top dry bag.
The Mechanics of Internal Pack Organization
The primary function of a stuff sack is organization, while the primary function of a dry bag is moisture protection. Blurring these lines often leads to inefficient packing systems. A common error among backpackers is attempting to place every individual piece of gear into its own highly compressed, waterproof dry bag. While this guarantees everything stays dry, it creates a structural problem inside the main compartment of the backpack. Highly compressed dry bags turn into rigid, unyielding cylinders. When you stack these cylinders inside a backpack, they cannot conform to one another, resulting in significant dead space or voids between the bags. This forces the use of a larger volume backpack and pushes the load's center of gravity further away from your spine, negatively impacting your balance and energy expenditure on the trail.
A more efficient approach relies on a hybrid system. A single, large waterproof pack liner—often made of a lightweight plastic polymer or thin waterproof fabric—serves as the primary defense against sustained rain or river crossings. Inside this liner, bulk insulation like sleeping bags and spare clothing can be packed loosely, allowing them to expand and fill the voids in the bottom of the pack. Stuff sacks and smaller dry bags are then deployed strategically. A dedicated dry bag might be used solely for a down quilt to provide a redundant layer of security, while simple, non-waterproof drawcord stuff sacks are used to group smaller items like electronics, first aid supplies, or cooking gear. This method maintains the malleability of the overall load, allowing the backpack to compress evenly and ride closer to the body.
Understanding the hydrostatic head rating of your chosen bags is also critical. Hydrostatic head measures how much water pressure a fabric can withstand before moisture penetrates the weave, usually expressed in millimeters. A bag made from a fabric with a 1,000mm rating will resist light rain, but if you kneel on that bag on wet ground, the pressure of your body weight can easily force water through the material. For critical items, fabrics with much higher ratings or inherently waterproof membranes are necessary to ensure performance under pressure.
Material Science: Composites vs. Coated Wovens
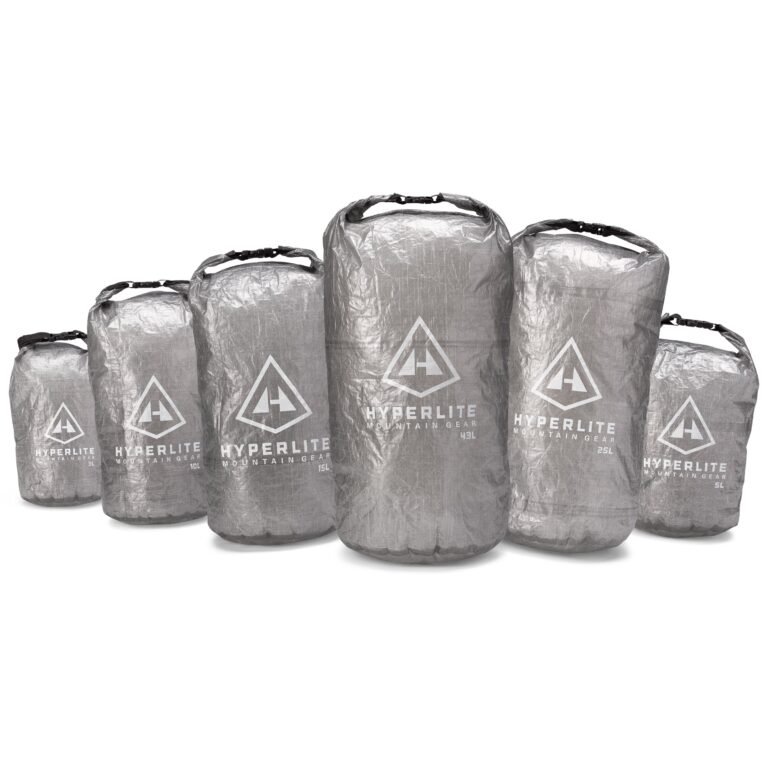
The material of your dry bag dictates its weight, durability, and long-term waterproofness. Dyneema Composite Fabric (DCF) is highly prevalent in ultralight dry bags, such as the Hyperlite Mountain Gear Roll-Top Stuff Sacks. DCF consists of ultra-high-molecular-weight polyethylene fibers sandwiched between thin layers of polyester film. It is inherently waterproof, absorbs zero water, and boasts an exceptionally high tensile strength-to-weight ratio. Because it does not stretch, DCF dry bags hold their shape well, which is beneficial for compressing gear, though the fabric can be stiff and prone to crinkling. Over long periods of heavy use, the Mylar film in DCF can develop micro-creases or pinholes, particularly if the bag is constantly folded along the same lines rather than stuffed randomly.
Siliconized woven fabrics, commonly referred to as silnylon or silpoly, offer a different set of characteristics. Silnylon is nylon impregnated with liquid silicone. It is highly durable and very slippery, making it easy to slide in and out of a tightly packed backpack. However, nylon absorbs water, meaning a silnylon bag will gain a small amount of water weight and may sag when wet. Silpoly utilizes polyester instead of nylon. Polyester is inherently hydrophobic, meaning it absorbs less water and retains its shape better when exposed to moisture. Both silnylon and silpoly require their seams to be sealed to achieve full waterproofness. This is typically done either by factory taping—if the fabric has a polyurethane coating on the inside—or by applying a liquid silicone seam sealer by hand.
The choice between these materials often comes down to budget and specific use cases. DCF is generally more expensive and offers absolute waterproofness until it degrades from abrasion. Coated wovens are more affordable, highly packable due to their supple nature, and offer excellent longevity, though they may require periodic re-application of seam sealer. For items that sit on the outside of a pack and face abrasion from brush or rock, a heavier denier DCF or a robust polyurethane-coated nylon is preferred. For internal organization where abrasion is minimal, ultralight silpoly or thin DCF variants excel.
Strategic Gear Selection for Modular Systems
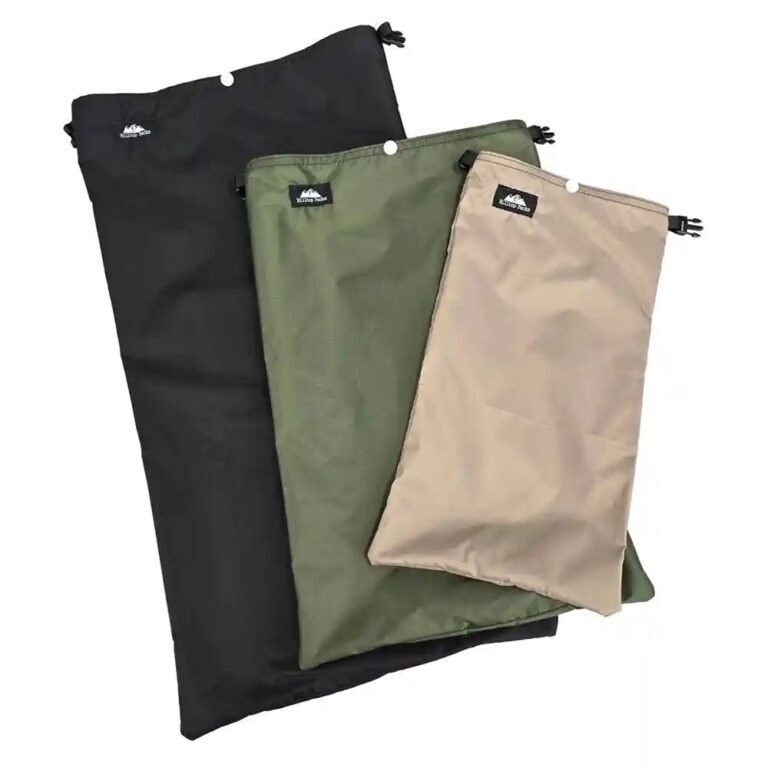
Selecting the right combination of bags requires matching the specific product design to your gear. The Hilltop Packs SmartPack Series addresses the common issue of visual identification. When multiple identical dry bags are used, locating specific items requires opening and closing several bags, which wastes time and exposes gear to the elements. The SmartPack series utilizes custom printing on the fabric, allowing hikers to visually identify the contents—such as first aid, electronics, or food—without compromising the bag's structural integrity or adding the weight of heavy labels or clear plastic windows. This visual organization is highly efficient for camp chores and emergency access.
For bulky, compressible insulation, specialized designs are required. Hammock Gear Dry Bags are often sized to accommodate the specific dimensions of top quilts and underquilts. When packing down insulation, the goal is to compress it enough to fit in the pack, but not so much that the down clusters are damaged over time. A dry bag used for this purpose needs a robust roll-top closure with a stiffener that will not buckle under the outward pressure of the compressed down. The seams on these bags must also be meticulously sealed, as a failure here would allow moisture directly into the critical insulation layer, which is a severe safety hazard in cold conditions.
When maximum durability and weather resistance are required, products like the Hyperlite Mountain Gear Roll-Top Stuff Sacks 3 provide a heavily reinforced solution. Built with DCF and featuring fully taped seams, these bags are designed for environments where water exposure is guaranteed, such as packrafting or hiking in sustained, heavy precipitation. The rigidity of the DCF material in these bags also makes them suitable for use as external storage, lashed to the outside of a pack, or hung as a food bag where they must withstand the friction of rope and tree branches.

The steps

Common mistakes
- Purchasing too many small stuff sacks, which adds unnecessary weight in fabric and hardware, and creates numerous small, hard shapes that pack inefficiently and leave dead space in the backpack.
- Assuming that a bag with a drawcord closure is waterproof; water will easily enter through the top opening if the bag is exposed to rain or if the backpack is submerged during a river crossing.
- Failing to roll the top of a dry bag at least three times; one or two rolls may look secure, but the fabric will easily unroll slightly under pressure, breaking the waterproof seal.
- Using a heavy-duty, thick PVC dry bag designed for whitewater rafting or kayaking for ultralight backpacking; these bags are excessively heavy and stiff, making them difficult to pack inside a standard hiking backpack.
- Packing wet gear, such as a rainfly or a damp water filter, inside the same dry bag as dry clothing or electronics, allowing moisture to transfer between the items.
Checklist
- Determine which items require absolute waterproof protection versus simple organization.
- Calculate the compressed volume of your gear to select the appropriate liter capacity.
- Add 20 to 25 percent to your calculated volume to account for the three-roll closure.
- Select DCF or heavy coated nylon for external use, and lighter silpoly/silnylon for internal use.
- Inspect all seams to ensure they are fully taped or properly sealed with liquid silicone.
- Verify that the buckle hardware is robust enough to operate with cold hands.
- Establish a visual or color-coded system to easily identify the contents of each bag.
FAQ
Do I need a dry bag if I am already using a waterproof pack liner?
What is the difference between a stuff sack and a dry bag?
Can I use my ultralight dry bag to hang my food to protect it from bears?
How do I clean my dry bags after a long backpacking trip?
Why does my DCF dry bag look wrinkled and worn after only a few uses?
The bottom line
A well-designed packing system balances the absolute waterproofing of roll-top dry bags for critical insulation with the lightweight organization of simple stuff sacks. By carefully calculating volume, selecting the appropriate materials for abrasion and moisture risk, and avoiding over-compartmentalization, you can protect your gear without compromising how your backpack carries.
Related guides
Keep building your system with these closely related guides.
- Ultralight Dry Bags and Stuff Sacks: The Complete Guide
- 4 Proven Ultralight Dry Bags and Stuff Sacks to Keep Gear Dry
Further reading
Authoritative sources to go deeper on the topics above.